Mr. Shaw

What can I do for you?

Mr. Shaw

What can I do for you?

Home> Industry Information> How to set up remote monitoring of the memory monitoring screen in the DVR?

How to set up remote monitoring of the memory monitoring screen in the DVR?

June 29, 2023

How to set up the monitoring screen stored in the remote monitoring DVR? Many netizens have left a message in the public number, and I will introduce it to you today.
If it is better in the same regional network, users only need to access the corresponding IP address to immediately view the surveillance video of the DVR, but what about the external network?
At this time, we need to solve the problem by using the operating principle of the website.
Here, we need to use the dynamic domain name of the peanut shell combined with the DVR to form a site-like structure for users to access the internal image of the DVR.
The basic structure is: "domain name - router - hard disk recorder", if you understand the operation principle of the website should be able to see that this structure is basically the same as the basic structure of the website operation.
Next, Xiao Bian here in detail the readers to introduce how to build a remote monitoring system for DVR.
The first step: register the domain name (here TP routing as an example).
Under normal circumstances, you can find the registered address of the domain name in the dynamic DNS settings of the router (the individual route does not have the option of peanut shell, you can also choose other domain name registration address, anyway, our focus is on the domain name.)
1, TP router

In the TP router, we can easily find the domain name registration address of the peanut shell.
2, Tenda router


There is no peanut shell inside the Tenda router, we can also use other domain name providers.
1), registered domain name (the following we all use TP router as an example)


Fill in the fields, click on the system will automatically send a free domain name to us, then we only need to activate it.
2), log in the router from the embedded peanut shell service, the login address of the TP router is generally http://192.168.1.1, the account password is admin, everyone knows, the simplest login account password; here, we return to the first In a picture, enter the password of the peanut shell account you just registered, and then you can log in. If the connection is successful, the dynamic resolution service is also completed, as shown below:


The second step: build a hard disk recorder remote monitoring system
1) At the beginning, we have learned that the basic mechanism of this DVR remote monitoring system is: “Domain Name – Router – DVR”, we can see that the router is connected with the DVR; In the above tutorial, we have connected the domain name to the router, and the next step is to connect the router to the DVR. After connecting through the physical line and turning on the power of the DVR, we can log in to the management settings through the default management address of the DVR. The login address of the DVR is generally explained. Here we take http://192.168.0.64/ as an example. After installing the control, just fill in the login account password and you can use it officially. The login interface is as follows:


Set the account here: admin Password: 12345
2) After logging in, if there is already an image in the DVR or it is connected to the camera, we can click to open the camera. If the screen appears, the camera is working normally. After that, we have to set the camera.


3) After setting the page, we will set the IP address to 192.168.0.64, the subnet mask to 255.255.255.0, the port number to 8000, and the HTTP port number to 8088 (80 ports cannot be used here because of telecommunications). Seal 80 ports, prevent others from doing websites, we can use them except for port 80), check if there is any mistake, you can confirm the save.


4) Open a browser and enter the IP address http://192.168.0.64:8088 (note that you want to add "HTTP://" and ":8088")
After confirmation, we can see the surveillance video. However, this can only be accessed within the LAN. To be accessible in foreign trade, you need to continue with the third step.
Step 3: Configure the port mapping of the router
1) Port mapping operation requires the router to map the recorder port "8000" and HTTP port "8088" just set to the IP address: 192.168.0.64. Log in to the router's management interface and find the "Forwarding Rules" - "Virtual Server" - "Add New Entry" to fill in the following information:
Port number: 8088 (how much is set in front.)
IP address: 19.168.0.64
Protocol: ALL or TCP
Common service port number: no need to fill in
Finally remember to save.

2), as in the above operation, map port 8000 to "192.168.0.64";
3) The port mapping work is completed.


4) After doing this, we open the browser just like the test in the second step, but this time instead of entering the IP address, we enter the domain address we just got: http://zengkebing.gicp.net: 8088, (don't forget to add "http://" and ":8088"). If you want to install the control, we will just install it.
5) After installing the control, you can see the login interface, enter the account you just set: admin, password: 12345 and log in with 8000 port.
6) After the successful login, you can see the monitoring screen.

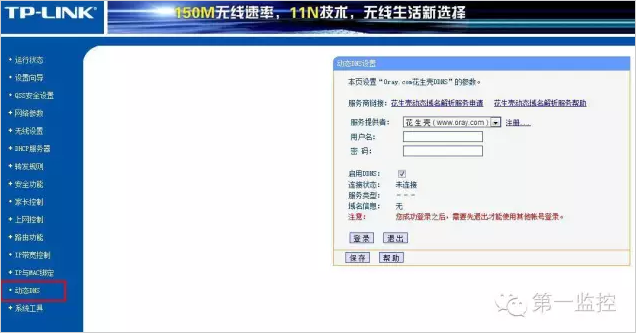
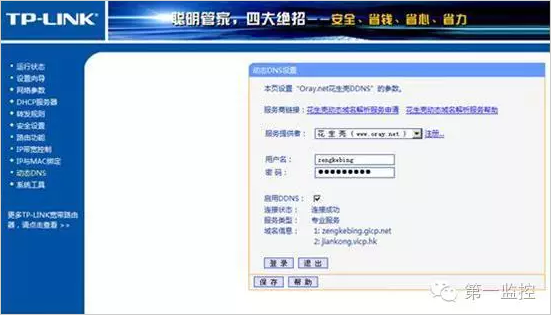
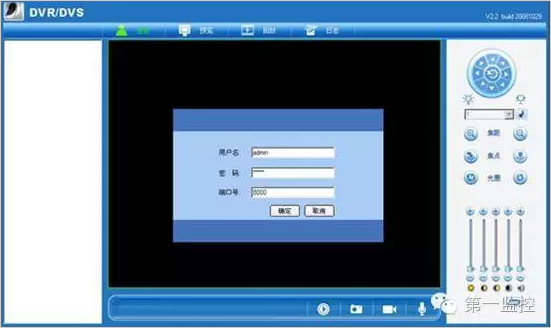
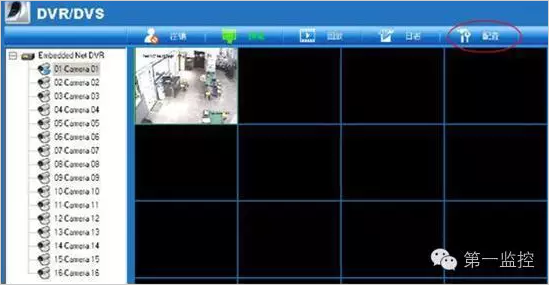
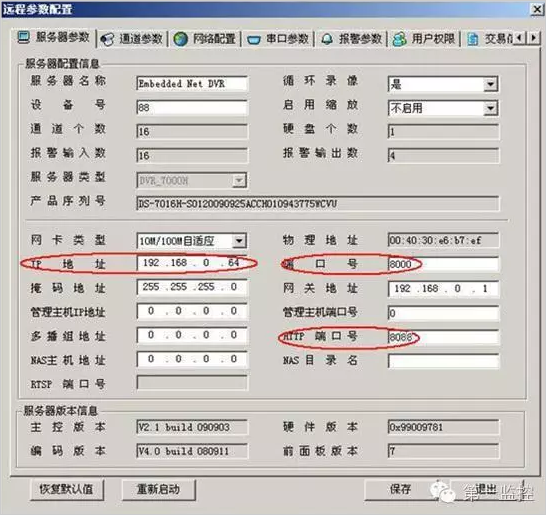
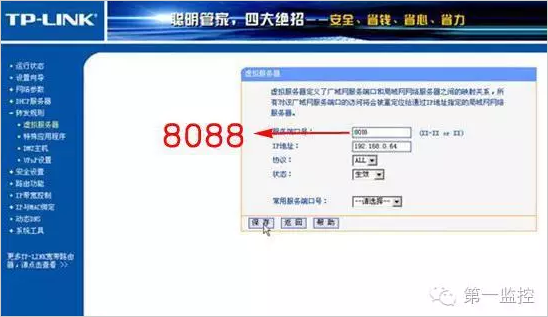
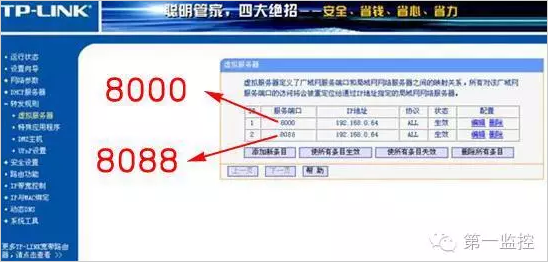
The above is the How to set up remote monitoring of the memory monitoring screen in the DVR? we have listed for you. You can submit the following form to obtain more industry information we provide for you.

You can visit our website or contact us, and we will provide the latest consultation and solutions

Share to:

Send Inquiry

Home> Industry Information> How to set up remote monitoring of the memory monitoring screen in the DVR?
We will contact you immediately

Fill in more information so that we can get in touch with you faster

Privacy statement: Your privacy is very important to Us. Our company promises not to disclose your personal information to any external company with out your explicit permission.

Send